In this guide, I’ll walk you through exactly how to cite in Jenni AI. If you’re writing a research paper, article, or academic assignment, adding proper citations is essential.
I’ll explain it in a very easy, step-by-step manner, using clear instructions, just like I would if I were showing it to a friend.
What Is Jenni AI’s Citation Feature?
The citation feature in Jenni AI allows you to automatically generate in-text citations from a massive library of academic and research articles. This means you can support your ideas with credible sources in just a few clicks, without the hassle of manually formatting citations.
Here’s what this feature helps with:
- Finding sources from a database of over 250 million research articles
- Adding citations to your text with just one click
- Automatically generating and formatting a reference list
- Switching between different citation styles instantly
Getting Started with Jenni AI
Step 1: Visit the Jenni AI Website
Go to jenni.ai
Step 2: Log In to Your Account
Once you’re on the site, log in with your credentials. If you don’t already have an account, you’ll need to create one first.
Inside the Jenni AI Document Editor
After logging in, I’m taken directly to my document editor. Let’s say I’m working on a paper and I just wrote this sentence:
Mercedes-Benz is a German based automotive producer.
Now, I want to add a citation after this line to show the source.
How to Trigger the Citation Tool
Step 4: Place the Cursor
Click right after the sentence where you want to add the citation.
Step 5: Type the Citation Command
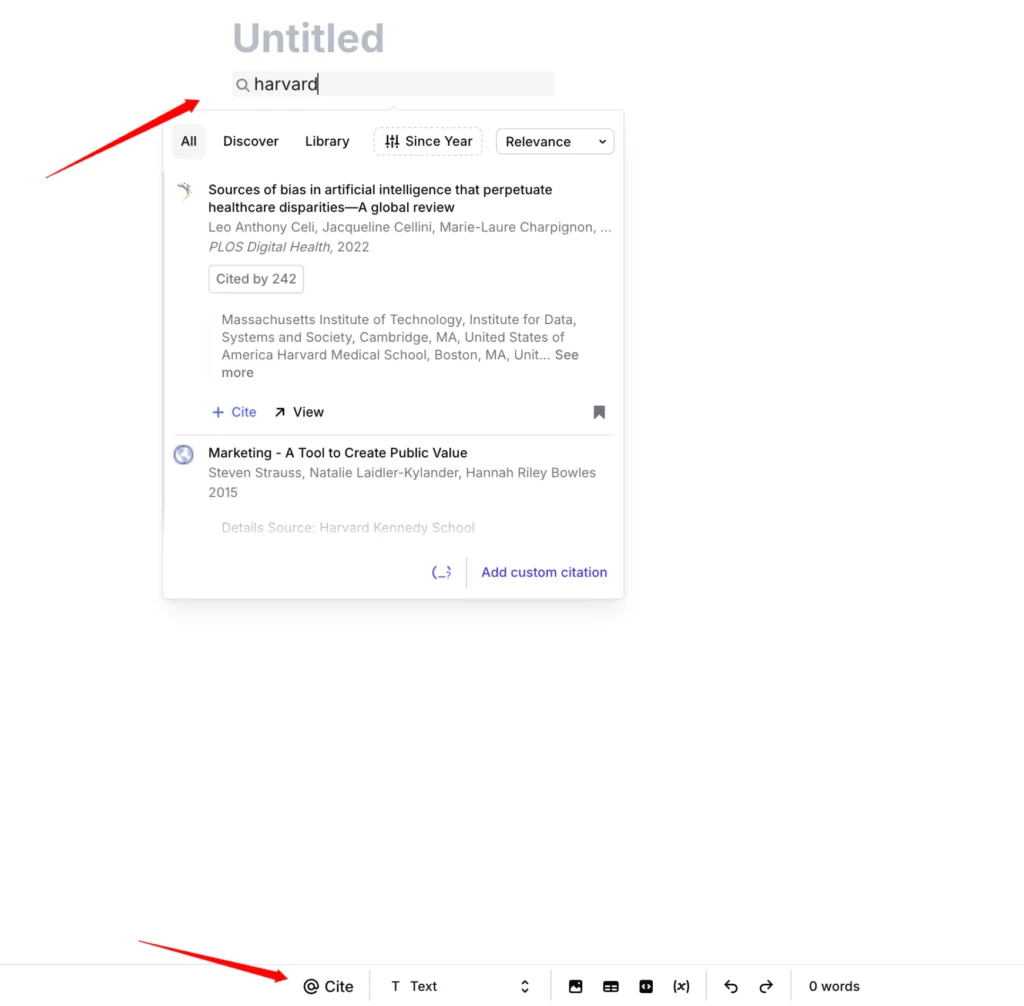
Now, simply type:@ (the at symbol)
As soon as you do this, Jenni AI will open up the Citation Window.
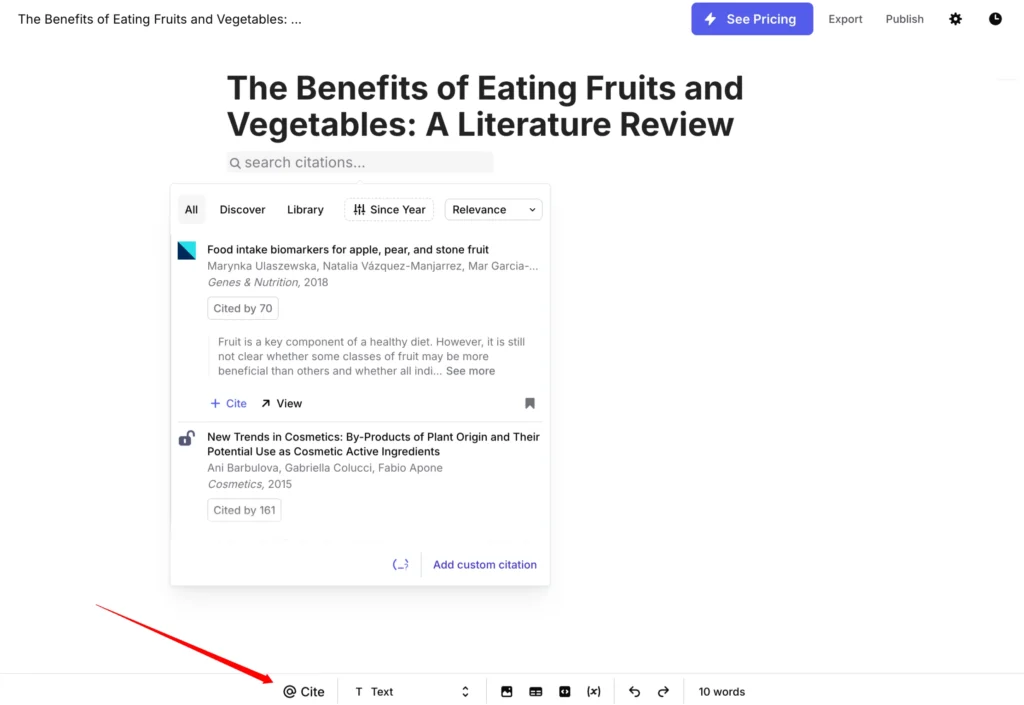
Understanding the Citation Options
Once the citation window opens, Jenni gives you three main ways to add a citation:
1. All
This option displays all citations related to the sentence you wrote. It searches and suggests references based on relevance.
2. Discover
This option is similar to All, but with more emphasis on suggested sources. However, most of the time, both All and Discover show similar content.
3. Library
This is where you can upload your own references, usually in PDF format. It’s handy when you already have academic papers or documents you want to cite from.
Using Filters in the Citation Tool
Jenni AI also lets you filter the search results.
You can filter by:
- Relevance
- Most Recent
- Oldest
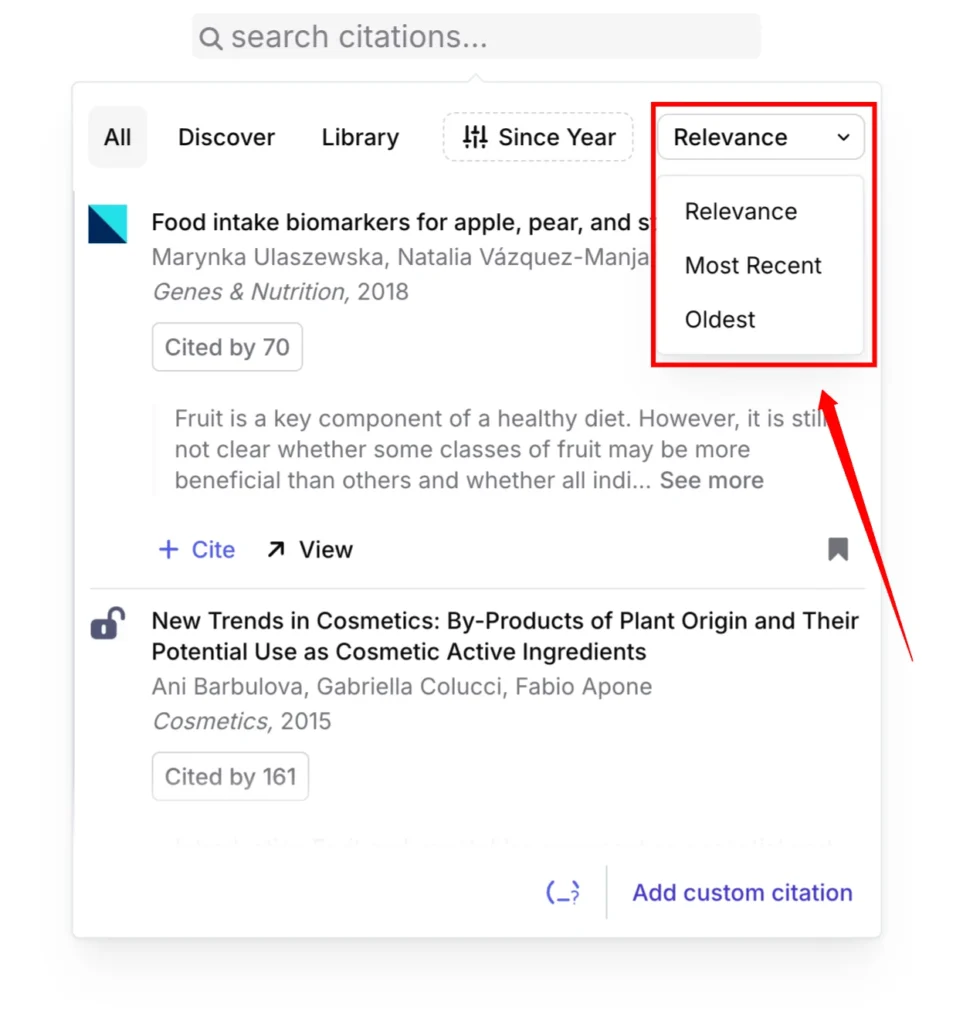
Let’s say I select Oldest — it will now show me citations starting from the earliest published date.
For example, it showed me a reference from 2001 that matched my sentence.
Uploading a Custom Citation (Manual Method)
If none of the suggestions fit, you can also add your own citation manually.
Step 6: Scroll Down and Click “Add Custom Citation”
At the bottom of the citation window, you’ll see an option called Add Custom Citation.

Step 7: Select Citation Type
Now you’ll be asked to choose the content type of your citation.
Here are the types available:
- Book
- Journal
- Website
- Video
- News article
- Blog post
- And more…
In my case, I’m citing a Wikipedia page, so I select Website.
Filling In the Citation Fields
Once you’ve selected the content type, you’ll see a form with fields. Here’s what I filled in:
| Field | Example Input |
|---|---|
| Title | Title |
| Website Title | Wikipedia |
| Accessed Date | 13 / 8 / 2024 |
| Author(s) | (I left this blank) |
| URL | https://en.wikipedia.org |
Step-by-Step:
- Title
Type in the title of the content. - Website Title
Enter the name of the site. Since I’m citing Wikipedia, I typed “Wikipedia”. - Access Date
This is the day you accessed the website. For me, it was 13th August 2024, so I entered:- Day: 13
- Month: 8
- Year: 2024
- Authors (Optional)
If your source has authors listed, you can type their names. I left this blank for Wikipedia. - URL
Now, head over to the website you’re citing. In my case, I went to the Wikipedia page. I copied the URL from the address bar and pasted it here.
Saving the Citation
Step 8: Click on Save
After filling everything, just click on Save.
Now, Jenni AI automatically adds the citation to your document. The sentence now looks like this:
Mercedes-Benz is a German based automotive producer.
(Citation)
Removing a Citation (If Needed)
If you added a citation by mistake or changed your mind, removing it is super easy.
Step 9: Click the Delete Icon
Next to the citation, you’ll see a small button or icon. Click it, and the citation is gone.
Managing Citation Styles
Jenni AI supports multiple popular citation styles, and switching between them is effortless.
Available Styles:
- APA
- MLA
- Harvard
- Chicago
- IEEE
✅ And more than 2,000 additional styles are coming soon!
To change the citation style:
- Scroll down to your reference list.
- Click the dropdown menu or settings button.
- Choose the citation style you need.
The entire document updates instantly:
- In-text citations reformat themselves automatically.
- The reference list adjusts to the correct style and order.
This is especially useful for students submitting papers to different institutions or journals, each of which may require a different citation format.
Quick Summary of Citation Methods
| Method | Description |
|---|---|
| @ command | Opens the citation tool within the document |
| All | Shows all suggested citations related to your sentence |
| Discover | Similar to All, includes suggestions and content from multiple libraries |
| Library | Upload your own PDF-based citations |
| Add Custom Citation | Manually fill in citation details like title, date, URL, etc. |
Common Use Cases for Citations in Jenni AI
You might want to add citations in the following situations:
- Academic writing (essays, research papers)
- Blog posts with external references
- Project documentation
- Technical writing
- Marketing content needing reliable data
Pro Tips for Citing in Jenni AI
- Always verify the citation: Double-check if the auto-suggested citation matches your sentence.
- Use recent sources for the latest information, especially if you’re writing about technology or science.
- Customize citations when the auto-generated ones aren’t accurate.
- Keep your PDFs organized if you’re uploading your own library references.
- Use descriptive titles when adding custom citations so you can recognize them later.
Why Proper Citation Matters?
Adding proper citations is not just about following academic rules.
- Shows that you’ve done real research
- Adds credibility to your writing
- Helps readers verify your claims
- Avoids plagiarism
Final Thoughts
Citing in Jenni AI is a simple and clear process. Once you remember the steps, placing your cursor, typing @, selecting your source, or adding a custom one.
Step-by-Step Citations Quick Guide:
- Log into Jenni AI.
- Go to your document.
- Place the cursor after the sentence.
- Type
@to open the citation tool. - Use All, Discover, or Library to find citations.
- Use Filters to sort by relevance or date.
- If needed, use Add Custom Citation to input your own source.
- Fill in the required fields (Title, Website, Date, URL).
- Click Save to insert the citation.
- Remove citations easily with the delete icon.
Leave a Reply