When I first started using Jenni AI, I was curious about how much it could really help with writing. I soon found out that the AI autocomplete feature could offer helpful suggestions throughout my writing process.
Today I’m going to walk you through exactly how I use this tool to stay productive and keep my writing flowing.
What Is AI Autocomplete in Jenni.ai?
Autocomplete in Jenni works like a smart assistant while you’re writing. It creates suggestions for the next sentence in your document, one at a time, and it gives you the control to accept or reject those suggestions.

The best part is that it doesn’t flood your screen with full paragraphs. It helps sentence by sentence, allowing you to stay in charge of your content and tone.
Triggering AI Suggestions Using Keyboard Shortcuts
One of the simplest but most useful features in Jenni AI is the keyboard shortcut to trigger a suggestion.
Here’s how I do it:
On Mac:
- I press Command + /
On Windows:
- I press Control + /
That shortcut works at any point in the document. Whether I’m starting a new paragraph or stuck midway through a thought, I just hit that combo, and Jenni pops up a suggestion for the next sentence.
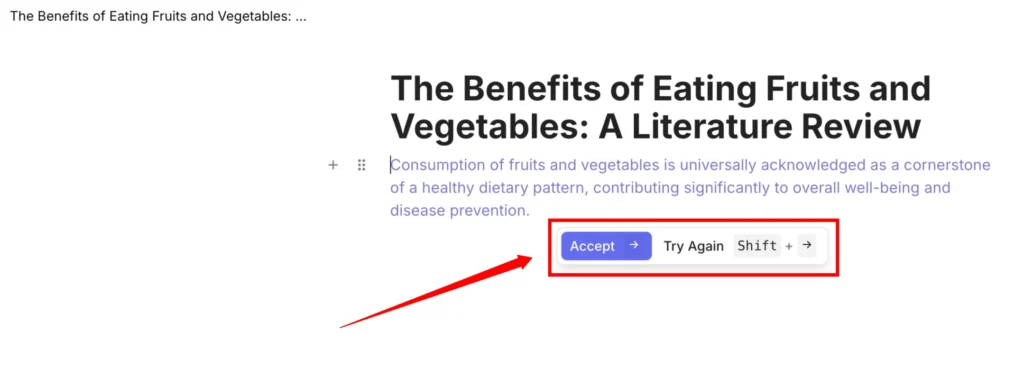
Accepting or Rejecting Suggestions in Jenni AI
Once Jenni gives me a suggestion, I have three clear choices:
- Accept the suggestion: Just click Accept if it sounds right and fits into your writing.
- Ask for another: If it doesn’t feel quite right, press Shift + → (right arrow), and Jenni will instantly give you a new version.
- Write your own: You can always ignore the suggestion entirely and continue typing your own sentence.
This flexibility keeps me in full control. I don’t have to use what Jenni suggests, but it’s always there when I hit a creative block or need inspiration.
Keeping the Flow Going When You’re Stuck
There are times when I just don’t know how to continue a sentence or paragraph. That’s when the autocomplete feature really shines.
Anytime I feel stuck, I simply:
- Place the cursor where I want a suggestion.
- Press Command + / (or Control + / on Windows).
- Wait for Jenni to give me a helpful next sentence.
This simple action keeps my momentum going, especially when I’m writing long pieces.
A Real Example of Jenni AI from My Experience
Let’s say I’m writing an introduction to a research paper. I’ve just finished this line:
“The rising use of AI in education is reshaping how students learn and interact with content.”
Then I feel unsure about what to say next. So I press Command + /.
Jenni might suggest something like:
“This transformation has raised important questions about accessibility, ethics, and effectiveness.”
That fits perfectly. I hit Accept, and I’m back on track.
When Jenni Adds a Citation?
Sometimes, Jenni surprises me by including a citation with the suggestion. This typically happens when the content relates to research, statistics, or academic sources.
For now, I usually just accept the suggestion and make a note to double-check the citation later. There’s a separate feature that handles citations more thoroughly, which I’ll cover in a future guide.
Toggling On Automatic Suggestions in Jenni AI
If I don’t want to keep pressing the shortcut every time I need a suggestion, there’s an option to make the process automatic.
- Go to the Settings in Jenni.
- Look for the Autocomplete Options.
- Find the toggle that says Enable Automatic Suggestions.
- Switch it ON.
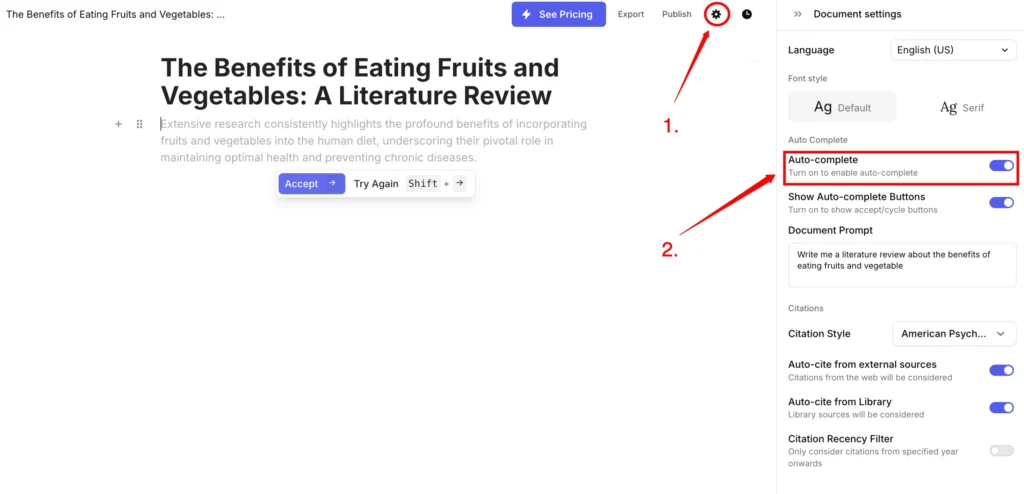
Once this is on, Jenni will automatically offer new suggestions as I type, without me needing to ask.
This is useful during heavy writing sessions when I want help every step of the way without having to break my typing rhythm.
Step-by-Step Guide to Using Jenni AI Autocomplete
To help you get started, here’s a simple step-by-step walkthrough based on how I use Jenni every day:
| Step | Action | Shortcut/Setting |
|---|---|---|
| 1 | Open your writing project in Jenni | — |
| 2 | Place your cursor where you want a suggestion | — |
| 3 | Press the shortcut for suggestion | Mac: Command + /Windows: Control + / |
| 4 | Review the suggestion carefully | — |
| 5 | Click Accept, Try Again, or type your own | Use Shift + → to try again |
| 6 | Repeat whenever you’re stuck | Use shortcut again |
| 7 | (Optional) Enable automatic suggestions | Settings → Autocomplete Options |
Why I Like the Sentence-by-Sentence Approach
There’s something very natural about the way Jenni works—offering suggestions one sentence at a time.
- Clarity: I can read each sentence and decide if it fits.
- Focus: It doesn’t distract me with long paragraphs or big blocks of text.
- Control: I stay in charge of the direction, tone, and pace of my writing.
What to Do If Suggestions Don’t Match Your Style?
Sometimes, the suggestions don’t quite sound like me. That’s okay.
Here’s what I usually do:
- Press Shift + → for a new version. Jenni often gives a completely different phrasing.
- Edit the suggestion manually. Just click into the text and tweak the wording.
- Skip it entirely and keep writing my own.
Over time, I noticed Jenni starts giving suggestions that are closer to how I write.
I think it adapts slightly based on how I edit or accept suggestions.
My Tips for Using Jenni Autocomplete Effectively:
If you’re just starting out, here are a few tips I wish I knew earlier:
- Use it when you’re stuck — It’s great for breaking through writer’s block.
- Try multiple suggestions — Don’t settle for the first one if it doesn’t feel right.
- Mix your voice with AI — Use Jenni’s suggestion as a base and add your own style.
- Turn on automatic suggestions — If you want a smoother writing experience, this helps a lot.
The Keyboard Shortcut Is Your Best Friend
The keyboard shortcut (
Command + /orControl + /) is what brings the magic.
Just use the shortcut and let Jenni do the thinking for a moment. It’s quick, easy, and non-intrusive.
Final Thoughts
Using Jenni AI’s autocomplete has made my writing process much smoother. It’s not about replacing my voice or ideas. It’s about getting unstuck faster, writing with better flow, and having a tool that offers just enough help without getting in the way.
If you’re new to Jenni.ai, start with the manual shortcut. Use it when you hit a pause or feel like the words aren’t coming out. Then explore the automatic suggestion option when you’re ready.
Leave a Reply